The Retropie 3000

My project was to make a retro gaming device. I found this to be slightly more difficult than I expected, as I am relatively new to the concept of emulation and ROMs. However, I think I got the gist of it, as I can use the Pi to play old games on any monitor.

I followed an online tutorial which helped me turn my Pi into a gaming system, which you can read here: https://www.pcworld.com/article/3190347/how-to-build-a-raspberry-pi-retrogaming-emulation-console.html

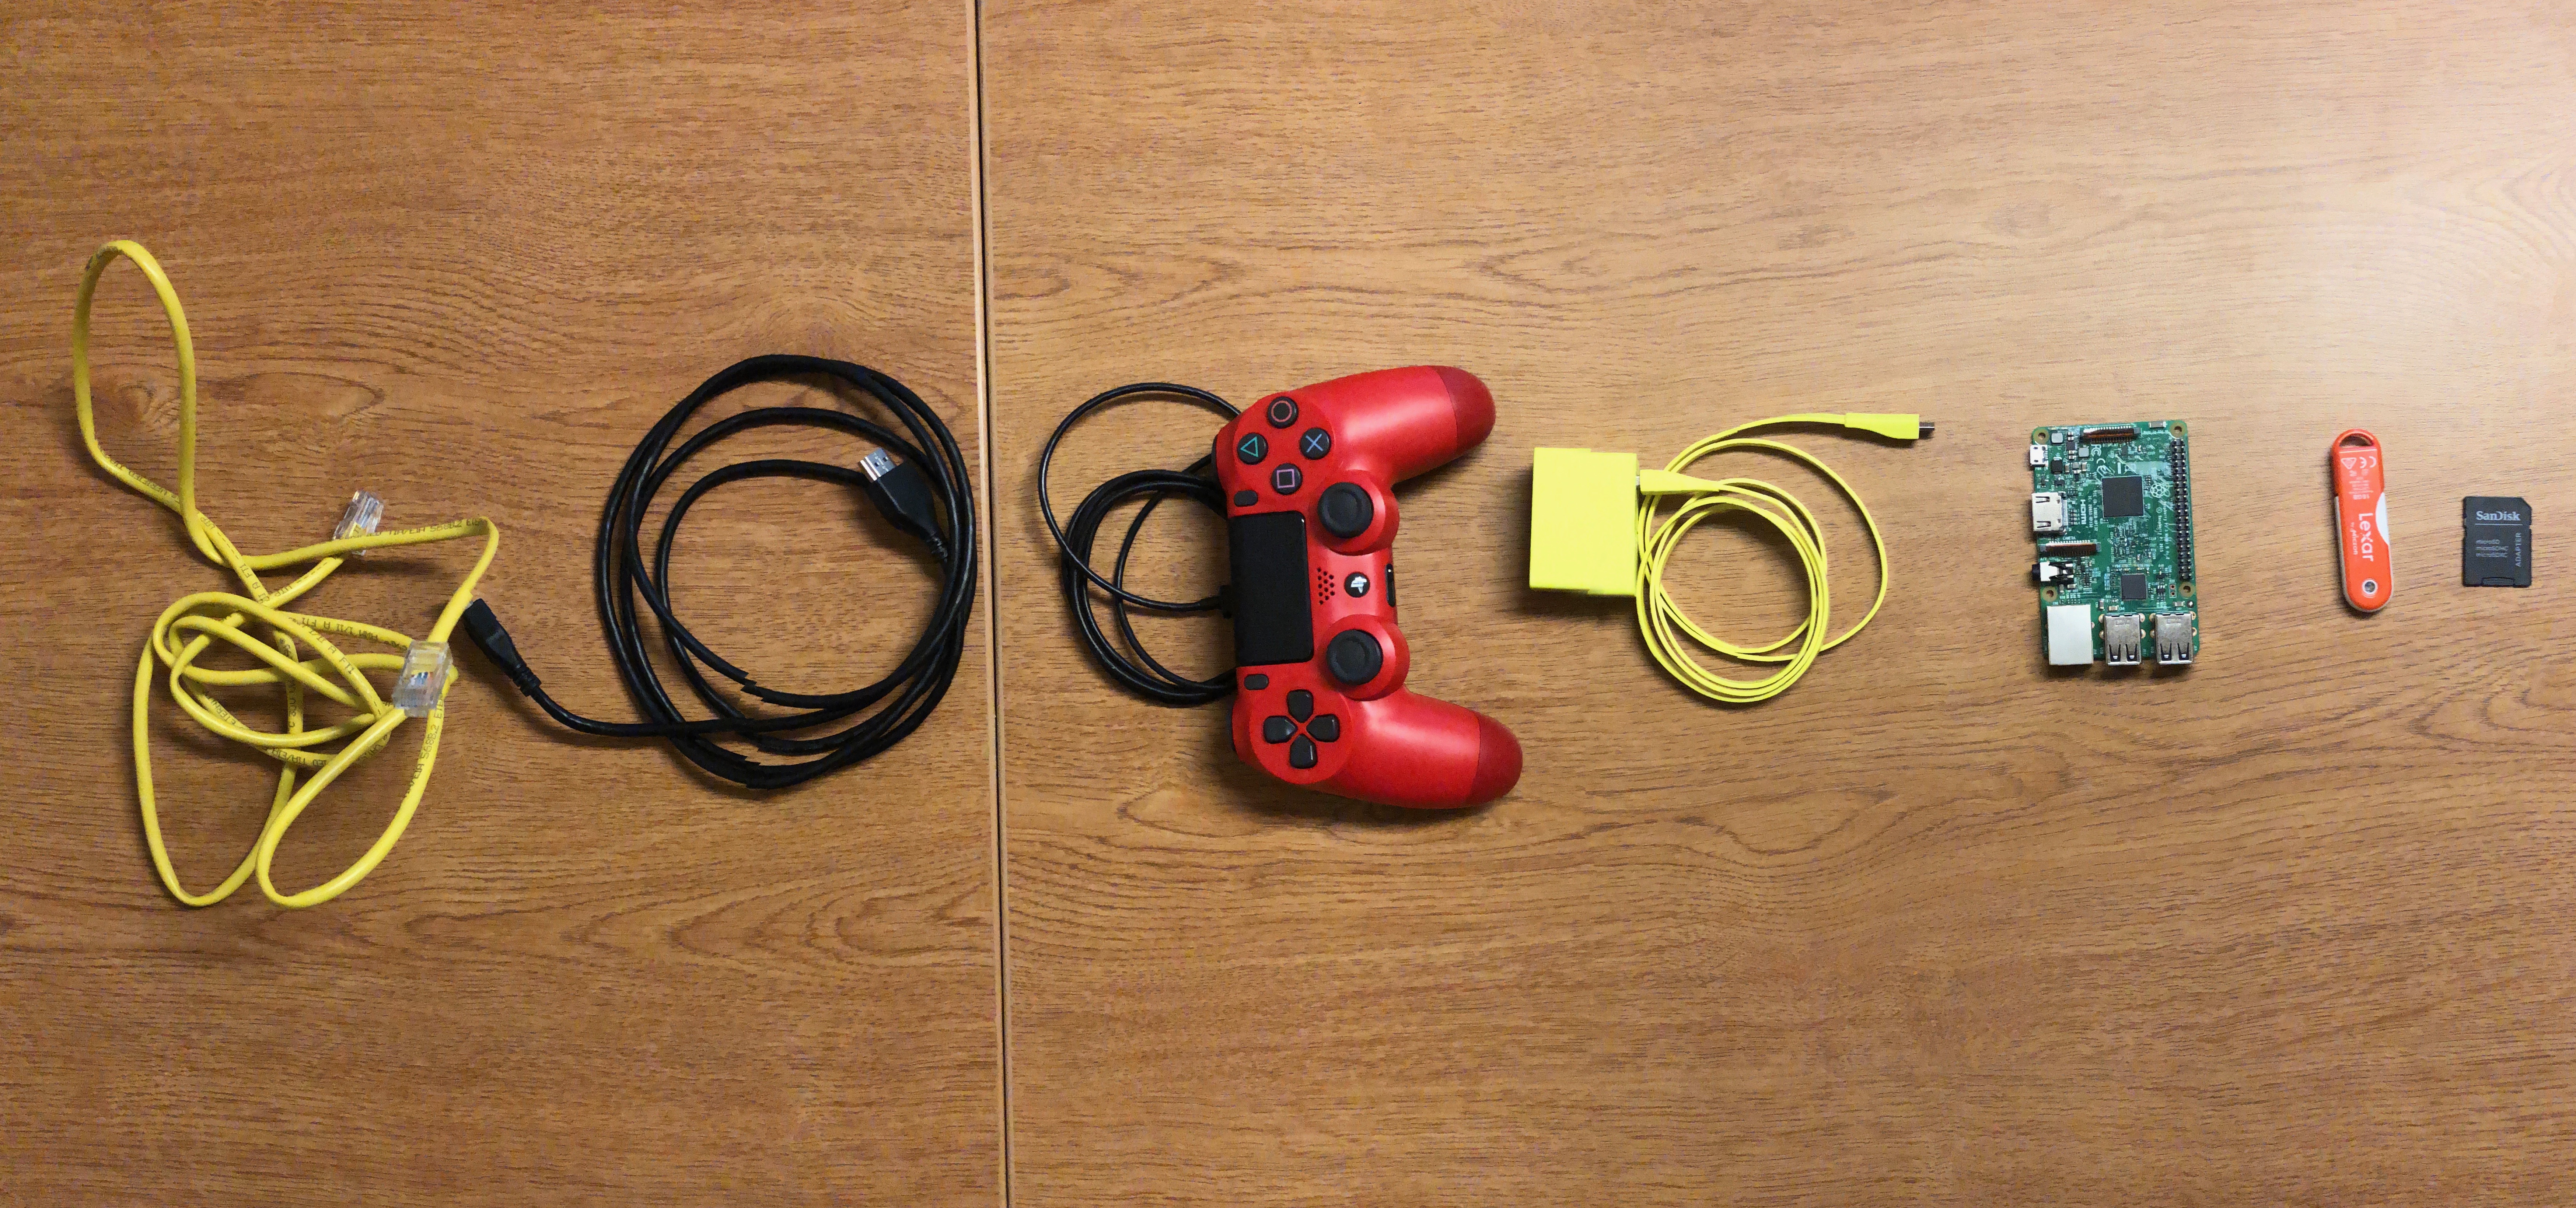
Below are some pics of what I needed in order to play my new gaming device:

From left to right: Ethernet cable, HDMI™ cable, Dualshock 4 controller and cable, micro USB cable, Raspberry Pi 3, Flash drive (16 GB), and a microSD card (8 GB)
Monitor: Vizio Smart TV

My first step was to erase everything from my pi, as I had previously installed Raspbian on it and needed to install the Retropie OS.

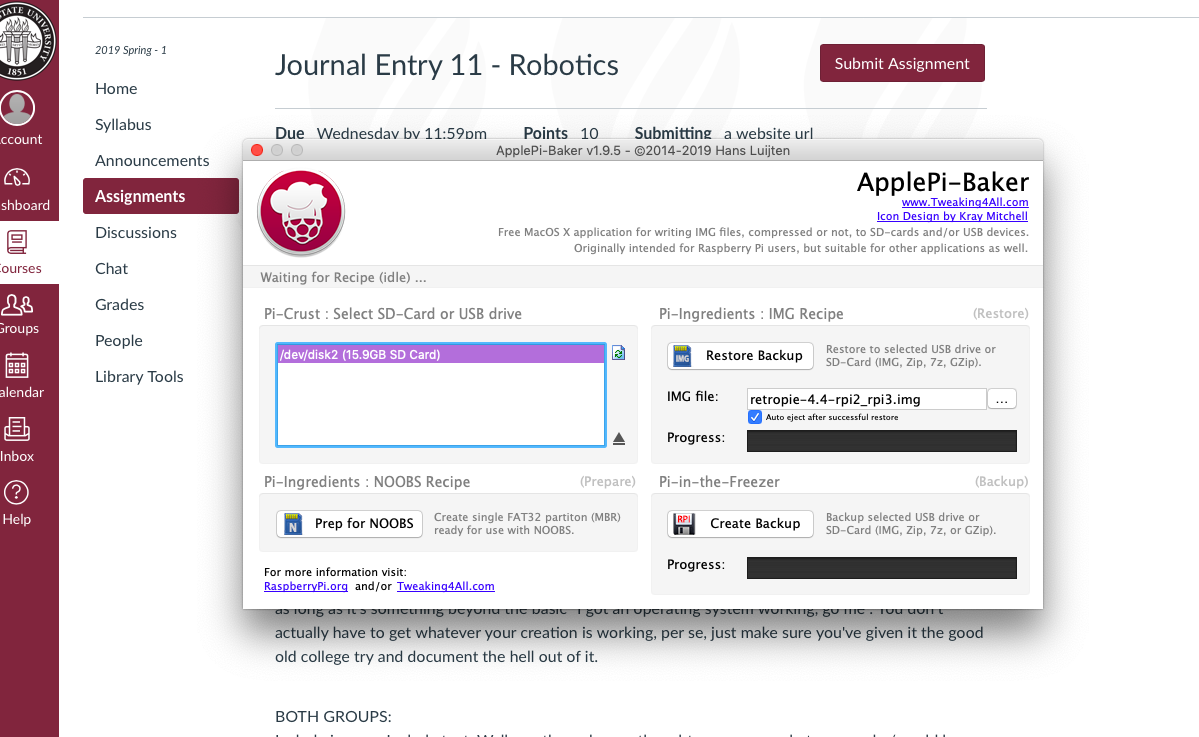
Next I had to get Retropie to run on my pi. I needed to download the Retropie software online and download another program called ApplePi Baker for my SD card to be able to read the Retropie software.

Using ApplePi Baker to move Retropie software to SD Card

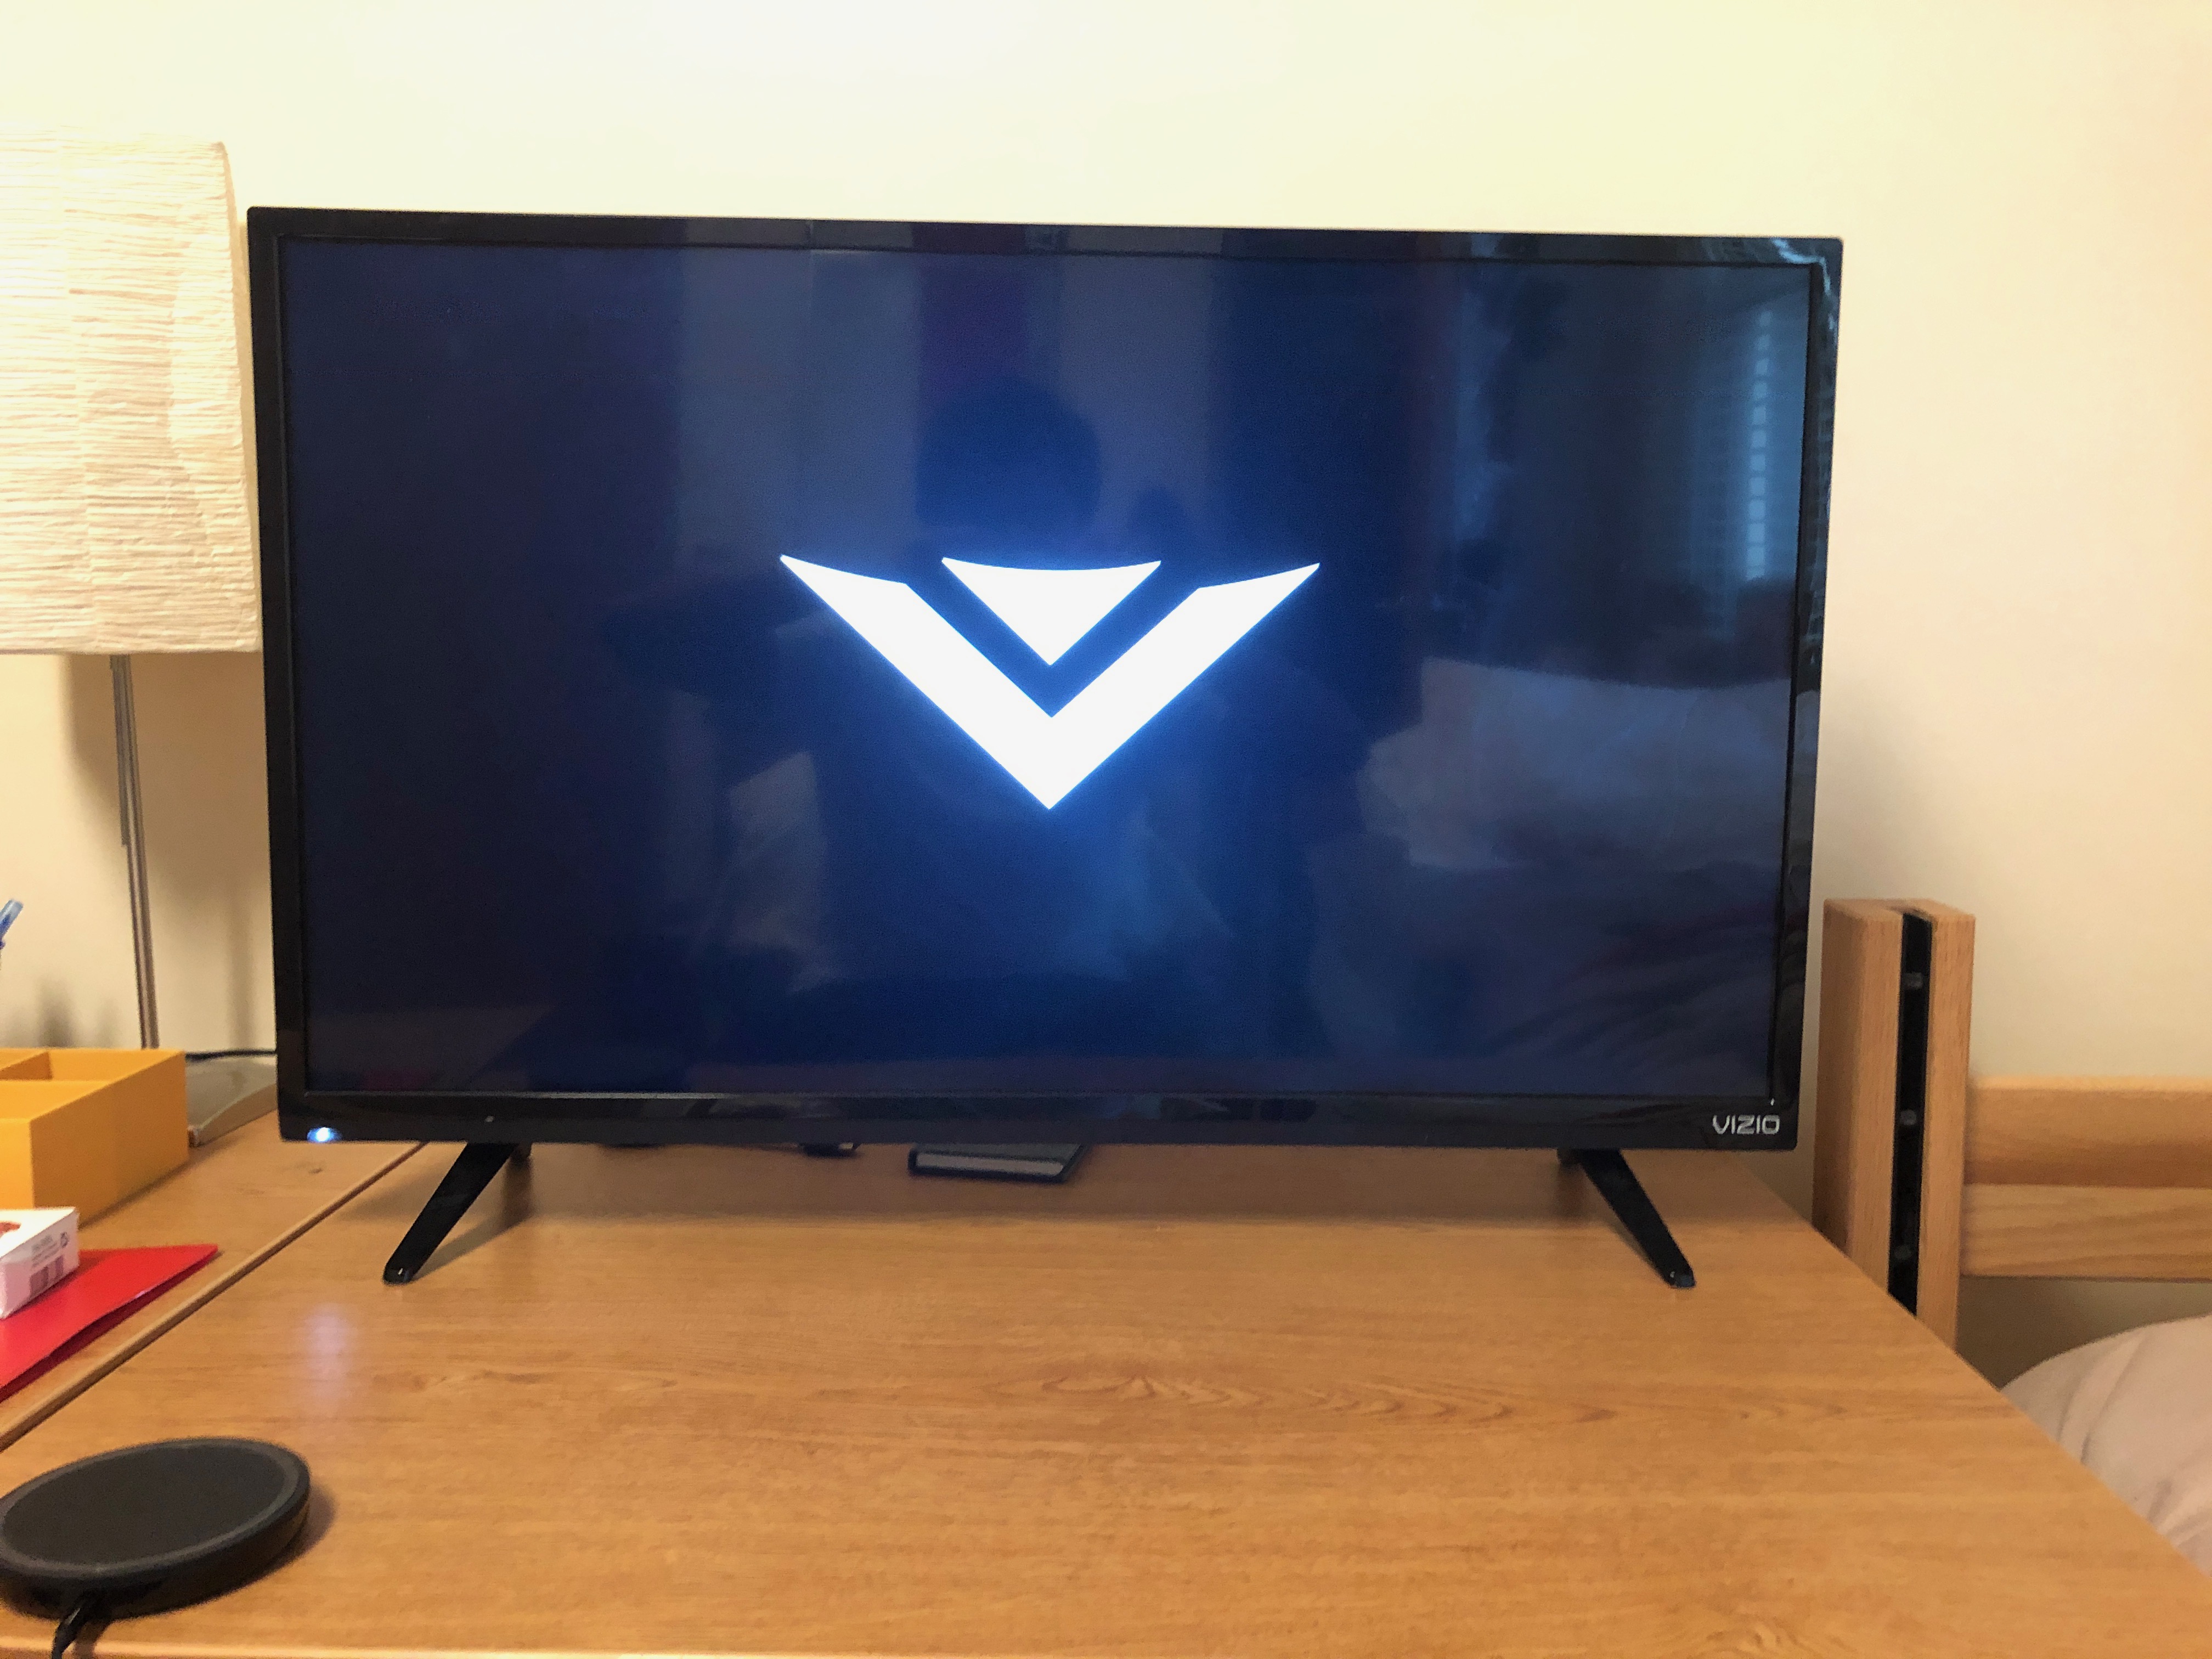
After copying retropie to my sd card, I was able to plug it in to my pi and attempt to boot it up. I inserted the sd card into the pi, hooked up the pi to my monitor using an HDMI cable, plugged in the ethernet cable, connected my controller to the pi and, finally, turned on the pi using the micro USB cable.

Here is the part of the project where I started to make small errors. When Retropie booted up, I needed to map the configure the DualShock controller and map the controls. I messed up on this twice, causing me to have to unplug the pi twice and start over, before mapping the controls correctly.

Mapping the controls

I want to share a little bit of wisdom before continuing with the story of my project. If you are ever copying a tutorial, such as a Retropie tutorial, or a following a recipe, or anything that requires you to follow instructions, read the COMPLETE tutorial or recipe before even attempting to begin working. You will save yourself so much time by skipping over things that may not apply to you or being better prepared beforehand to finish whatever it is you are doing in a more efficient way.

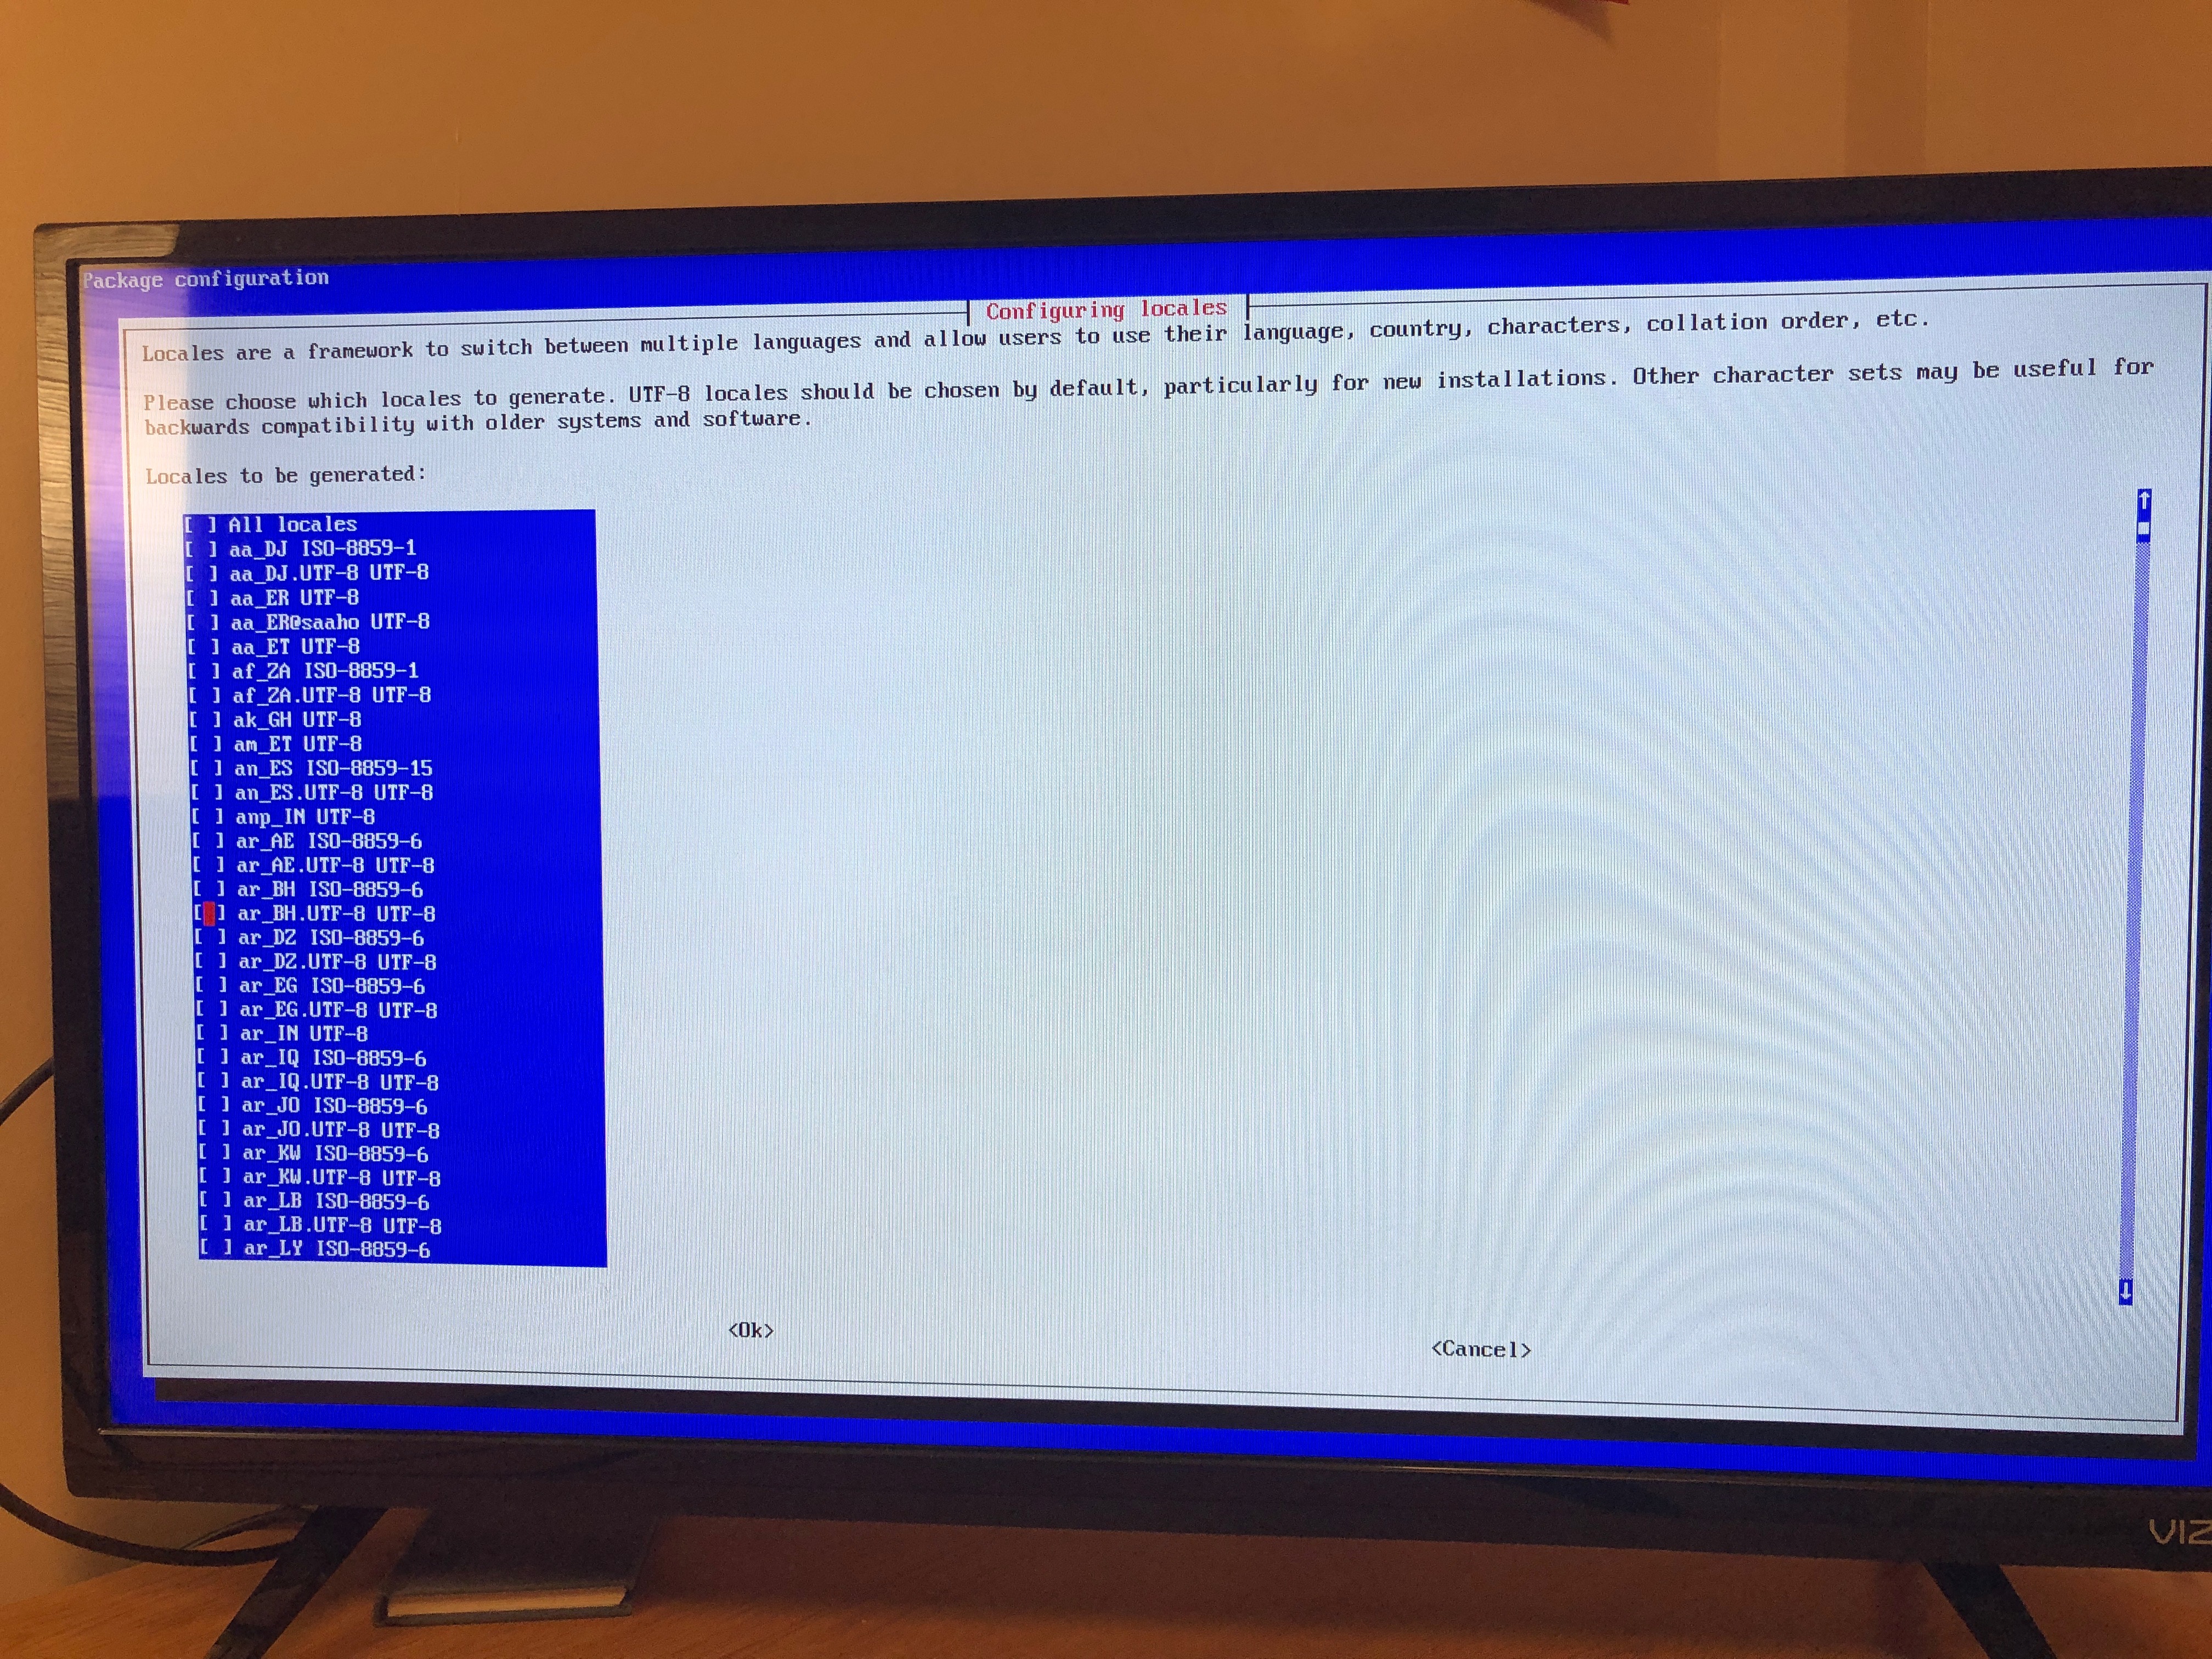
I did not follow this advice, and proceeded to spend around 45 minutes trying to change the language and timezone settings before realizing that none of this was integral to making a fully functioning retro game station.

Going to the configuration settings
Pic of me navigating the Locale settings and attempting to find the US locale. I had to manually click on my controller d-pad one by one to go to the next option before realizing that I could not back out of this screen. The only way to leave the screen was to unplug the pi and for some reason, I did this 3 more times trying to find a way for it to work. I made the same mistake trying to change the keyboard settings, even though I didn’t even have a keyboard to connect :/ Crown me the donkey of the day

After skipping this part of the tutorial, I decided to play around with the system a bit. Occasionally, my monitor would go black for a second and then go back to normal. Although this was weird, the system still worked fine. I even managed to change the picture that appears when retropie boots. Here is a vid of what I made it look like. It takes some time to boot up but it works. The image of Retropie is what their logo was in 2014.

Changing how retropie boots up

Now for finding games I wanted. I loved playing Pokemon and Super Mario as a kid, so I decided to find those ROMs first to test if the emulator worked. I downloaded a Pokemon Emerald for the GBA and Super Mario 64 for the Nintendo 64, two systems that Retropie should be able to emulate.

Pic of tutorial I followed to move ROMs onto Retropie and the files on my USB stick

After booting up Retropie, I can safely say that the system works great, and I will be taking it back home with me to play with my friends. My friend and I were able to play Pokemon Emerald and got all the way to the Fortree Gym before we got bored. That took up basically most of my day.

Everyone knows Mudkip is the best starter

I did have issues trying to exit the game, but I googled it and wrote down the shortcuts to quit the game, create a save state, load a save state, and how to reset the game. Here is a video of my friend using Retropie and our first attempt at playing Super Mario 64.

First time playing Nintendo 64

So overall, the system works great. When I get back home for summer I am going to buy a larger sd card to store more games and will set it up in my room so I can play. I will try and set up the DualShock controller to work wirelessly and will also try and play around with how the UI looks because I might like another theme better than the default one. I also want to 3D print a case for the pi so it looks like an actual pi. These are all great additions to the system but I am just happy that the emulator runs smoothly and that the controls work correctly. I hope to have a lot of fun with this system over the summer.

Virtual Reality (Check)

My partner (Connor Bruce) and I got together on Tuesday April 30 to record a video of me playing the virtual reality game. The premise of the game is simple: you start on a platform and must jump to a higher but smaller platform without falling off. If you missed the small platforms, you would fall outside the play area, but would get respawned on the original, larger platform. Connor was able to write the respawn code and it was all working on the unity play screen. An image of the code can be found on Connor’s post (which I will link at the bottom of this post). I even managed to get to the third block when I played before falling off and respawning.

The game in Unity; Worked perfectly fine within Unity

We assumed that the game would work when we opened it on the oculus. This was not the case. What we expected to take at most 30 minutes took us about 4 hours.

Attempt 1: I tried to play the game on the oculus, but I was only able to view the game on the desktop view within the oculus None of the controls would let me operate the player and we could only move around using the keyboard connected to the computer.

Attempt 1: In the oculus, the game looked like this but in a desktop window. Controls or head movements would not work

All the buttons for VR support were checked of but the game would still pop up on the oculus’ desktop view. After some research, Connor discovered that maybe the game would work if the Oculus Integration Assets were added.

Downloading Oculus Integration Assets.

Attempt 2: Once the assets were loaded, Connor realized there was an OVR Controller option which was similar to the FP Controller from Standard Assets. After adding this to the game, we were able to look around and move. However, the respawn didn’t work and most importantly, we couldn’t jump. We couldn’t jump. . . in a jumping game. You can see this is a problem, as shown in the video below.

Attempt 2

Attempts 3-6: In a span of 3 hours, we tried researching any possible hint s to why our controls were not working. We looked through reddit forums and oculus dev forums but to no avail. We tried the game 4 more times but still couldn’t get it to work.

Lucas arrived at the iHub around this time and we asked him for help with the game. When we asked him about the respawn script he said “NOOOpe”. We thought all hope was lost, until he told us to plug in an Xbox 360 controller.

Attempt 7: After plugging in the controller and with a little tweaking, we were able to finally jump in our jumping game. Great success. Here is us getting excited that we were able to jump:

F**k yea we got it, kinda

We were still attempting to fix the respawn aspect of the game, but were not successful in doing so. We asked for help from someone who knows code in the iHub. He told us the script should’ve worked but was not sure why we weren’t responding. We didn’t know what to do at this point so we attempted to play the game one last time.

Final Attempt: Here it is. Our jumping game in all its glory. Hopefully we can get it in the app store one day.

I don’t wan’t to play a VR game ever again

Additional Info:

I was originally trying to create a portal-type game which would somehow transport the player through the tree and into a separate platform. From here the player would have to escape a rolling ball of death, Indiana Jones style.

However, when Connor told me about his idea, it seemed much simpler. Since he knows way more about this kind of stuff than I do, I realized I was overthinking this and partnered up with Connor.

Early screenshot of Indiana Jones Game.

With regards to our issues, maybe if we designed the game on a PC we probably would’ve been able to run it on oculus. However, my partner and I both had Macs and we weren’t aware that it would be such a big issue crossing over from a Mac to desktop. With regards to the script, maybe the script for respawn is different for an oculus. That could’ve been the problem but the iHub guy said the script was correct so we’re not too sure what the issue was. Luckily, we were able to figure out the jump controls, which is what really matters when playing a jumping game.

Check out my boy Connor’s page: https://connorcorp.wordpress.com/2019/05/01/vr/

Cable Cubby

Part 3

My creation is complete. After 14 hours of printing, my Cable Cubby came out looking good on its first try. I had to shrink the dimensions a little bit (215 mm x 144 mm x 62 mm) because its first dimensions just barely did not fit the printer. However, the Cable Cubby was still able to serve its purpose. It came out a nice Melon Yellow color to match the beige pallet of my room. I wanted to make it bluet match my bucket but sadly the Innovation Hub ran out of blue. However, the Cable Cubby still looks good on my desk. It works great, as I have already placed my cables into the cubbies and separated them based on what they were used for. Some categories include headphones/ headphone accessories, apple products, and vape cables. I also placed 4 circular pads on the bottom of the Cable Cubby so it would stay in place. The pads are rubber and stick to the cubby very well. Overall, the creation serves its intended purpose.

Cable Cubby
Rubber Pads I used for Cable Cubby
Cable Cubby being used

Fabricating for a Function

Part 2

In Part 1, I described that I needed to create some sort of container to hold cables and charging boxes so my desk can look less cluttered. I designed a “Cable Cubby” on fusion360 and it came out pretty good. Although it was a simple concept, this took me over an hour to get accurate and symmetrical measurements to create the different cubbies. One cubby is 80mm*80mm*70mm and the creation in total is 2 by 3 cubbies. However, I needed extra space to have a barrier separating the cubbies, so I made each barrier 2mm wide. This makes the whole “Cable Cubby” 248mm*166mm*72mm. I did not have lots of difficulty creating the holes in my model but I did have to constantly keep deleting the holes I made because I was not taking into account the size of the barriers. I learned that I should probably have a list of measurements or some sort of blue print before I create something instead of just trying to figure the measurements along the creation process. I also learned different ways to make holes but ultimately just used the simple way of cutting with multiple boxes.

Rendered
Not rendered

Fusion 360

Fusion 360 was so much easier to use compared to freeCAD. In fusion 360 the interface was much easier to understand because everything is labeled. The models are much easier to view as well because I can orbit and move around in a simpler way than freeCAD. Fusion 360 was more helpful than freeCAD because when you encounter an error in fusion 360, it explains to me that a window is open or that there is already a line there. Whereas in freeCAD it would not really explain the issue. I thought fusion 360 made models look simpler which helped me visualize what I wanted to do better than freeCAD. I also thought that fusion360 was more organized with the layout than freeCAD.

Tutorial Object

Fabricating for a Function

The goal for this assignment was to find something that could be improved if I made a 3D model of it. I decided that my desk in my room was too cluttered with cords and cable boxes (iPhone chargers, headphones, rubber bands, etc.). A 3D model of a box with different sections would be perfect for organizing and holding my different boxes and cords. The box would be open from the top and would have 6 sections. The sections would be organized 2×3 and would be able to fit in the space between my TV and my PS4, right in front of the bucket that holds my pens.

FreeCAD Basics

Object 1: The first object was fairly easy to recreate due to the fact that I was following a tutorial. I did have some trouble finding my file after I would save it and I did get confused when differentiating between horizontal/vertical constraints and fixing horizontal/vertical distances. Overall, the object took me around 1 hour to build because I kept having to restart or having to undo lots of my mistakes. FreeCAD is a difficult program to use so I feel like I could have made this in under an hour on another program.

Steps: I first created a body and sketched a shape that looked like a triangle except the top side was flat. I then made the shape 3d and used the pocket tool to make the flat, top side have a protrusion in its middle. I then used the pad feature to have the bottom side of the triangle have a rectangular shaped protrusion coming out of it. I mirrored it on the other side as well. From here all I was missing was the hole in the middle of the shape. I did this by going to the back side of the structure, drawing a rectangle on the back side, and linking it with a rectangle on the slanted side. Then used the pocket feature to create a hole through the middle and voila, and I had the following object:

My Object 1

Object 2: This object was designed to hold a charging cable for my laptop

Object 3: These objects are meant to fit each other without falling apart

Audacity Sound Assignment

This sound clip was modeled after the time my RA knocked on my door while I was cleaning up after my friends came over. The knocking noises and the door opening noises were recorded by me and I also played the role of myself and the R.A. I changed my pitch to sound like a different person. The song in the beginning is “730” by Rich Gang and the glass breaking and clean up noises were sound files I got from free sounds.org. I will leave the links below.

This sound clip begins with music playing loudly followed by knocking at my door. I accidentally drop a bottle as I am cleaning up and when I answer the door, my R.A just tells me to keep it down.

Link to soundclip: https://soundcloud.com/experi_me_nt/music-too-loud/s-hBygo

Reference:

CollectingGarbageCleanupTable.wav: Freesound.org by p4.jimmy

GLASS sweep- sweeping shattered glass (SFX).wav by mickfire

About Me

I’d like to start off by talking about myself. I am Jonathan Navarro, a freshman and a business major at FSU. I am from Miami and grew up going to school in Miami Beach. High School was the first time I became really interested in technology, taking courses in Information Technology and Google Analytics.

I chose to take the emerging technologies course because I was told I needed to take an IDS class and learning about new technologies seemed really interesting. Technology will never stop evolving and I would love to learn about many of the new technologies that improve our world. One thing I would like to learn about while in this class is computers as I would like to eventually build my own computer one day.

When my friends and I met Logan Reese